
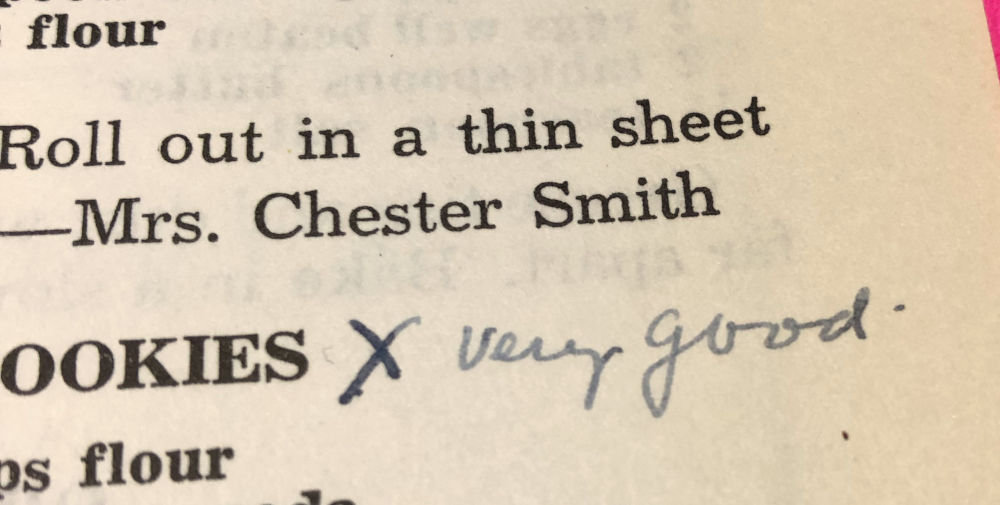
When your great-grandmother marks a recipe for chocolate drop cookies with frosting as “very good,” you make those cookies. I’ve been exploring a very old cookbook that my mom gave me last year. It’s taken me awhile to actually make anything from the cookbook, because the recipes are…spare. Too spare for me to attempt in the past, but I’ve gotten comfy enough to try some of these old recipes. Some tweaking was necessary to bring them up to date, but I’m excited to try more!
Adventures in Chocolate Drop Cookies
Like many of you, my first experience with drop cookies was with chocolate chip. I’ll be honest, I don’t think I’ve really made any other kind of drop cookie. So, when I saw “very good” written next to the recipe for chocolate drop cookies with frosting, I had to try.
As I said, the recipes in this cookbook are spare. This particular one included an ingredient list and the instructions “bake in a moderate oven.” Yep, that’s it. Suffice it to say, I had to experiment a bit to see what worked the best. I’ve written those instructions down in my recipe below.
Updating an Old Cookie Recipe
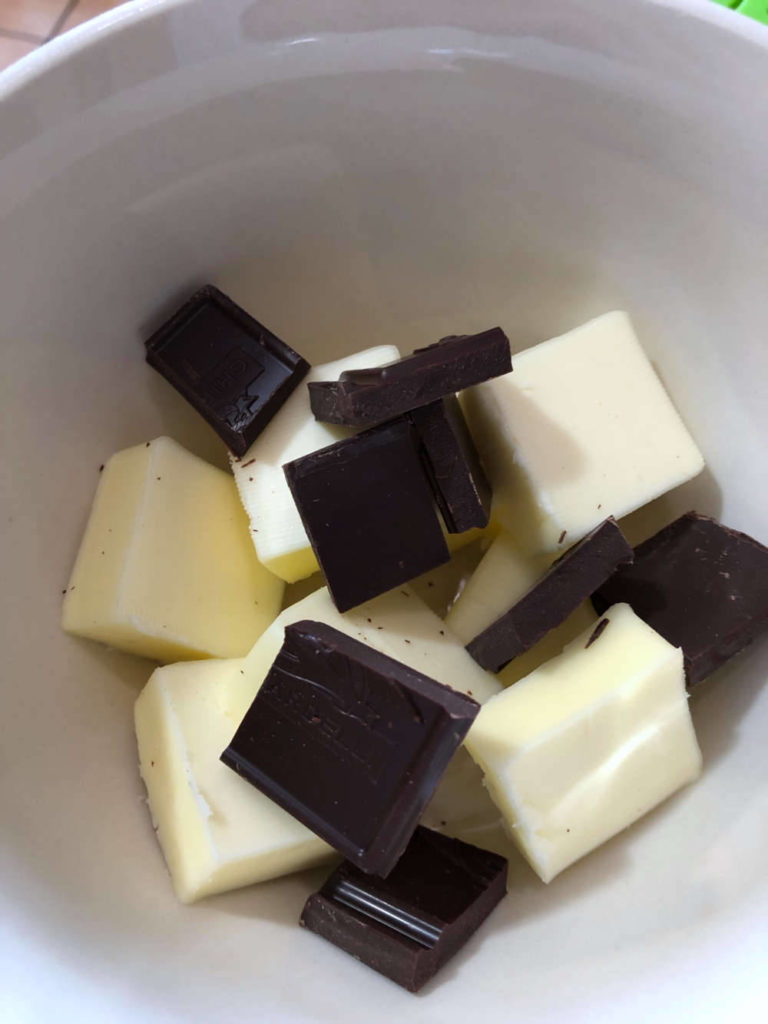
This is the easiest recipe to update, so I chose to do it first. The drop cookies seem fairly straightforward, and mostly the method was missing. First I tried the all-in-one method, where you add all ingredients at once and mix. The cookies weren’t bad, but were a little off texture-wise. Then I tried the creaming method. Unfortunately, adding the chocolate and milk later meant that the cold milk created chunks of chocolate. I’m pretty sure that’s not supposed to happen. The method I finally decided on was to melt the chocolate and butter together, and cream them with the sugar first. Then I added the egg and beat them until fluffy, and then added the flour mixture and milk together at the end and folding in the nuts last. The result is a slightly cake-y chocolate drop cookie that came together beautifully.


Figuring out the Frosting
With the chocolate drop cookies done, I now had to figure out the frosting. The instructions were a little bit better for the frosting. It actually said to use a double boiler, and stir “until smooth.” Unfortunately, that made for a seriously runny “frosting.” It’s definitely not a spreadable frosting. I experimented further. I found that if I got it to spreadable consistency, it was way too sweet. In the end, I decided on a happy medium: a sort of dipping glaze.
What are your favorite drop cookies? Let me know in the comments, and let me know if you try these chocolate drop cookies!

Chocolate Drop Cookies with Frosting
Old fashioned chocolate cookies with a chocolate glaze-like frosting
Ingredients
- For the cookies:
- 1 c. brown sugar
- 1/2 c. butter
- 1 egg well beaten
- 1/2 c. milk
- 2 squares of chocolate
- 1 1/2 c. flour
- 1/2 tsp. baking soda
- 1 tsp. baking powder
- 1 c. chopped nuts (I used pecans)
- For the frosting:
- 1 square chocolate
- 3 tsp. cream
- 1 egg, unbeaten
- 1 1/2-2 c. powdered sugar
Instructions
Preheat the oven to 350 F.
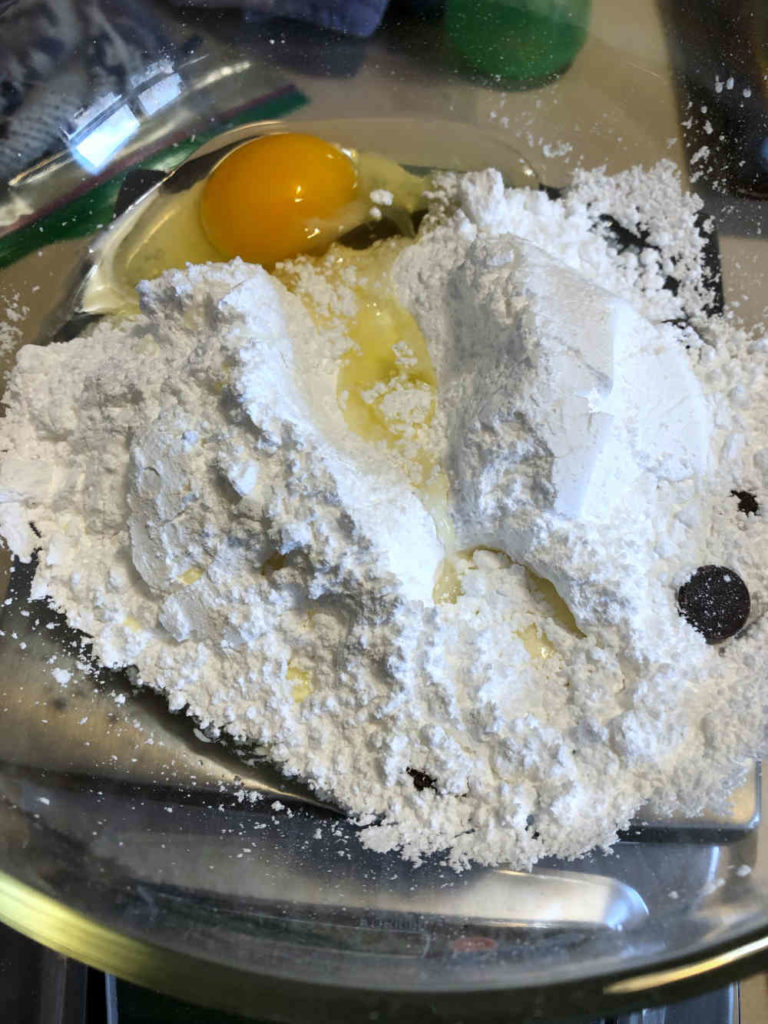
In a microwave safe bowl, melt the butter and the chocolate in the microwave, about 1 minute on high.
In the bowl of a stand mixer fitted with the paddle attachment, put the brown sugar. Alternately, put the brown sugar in a large mixing bowl.
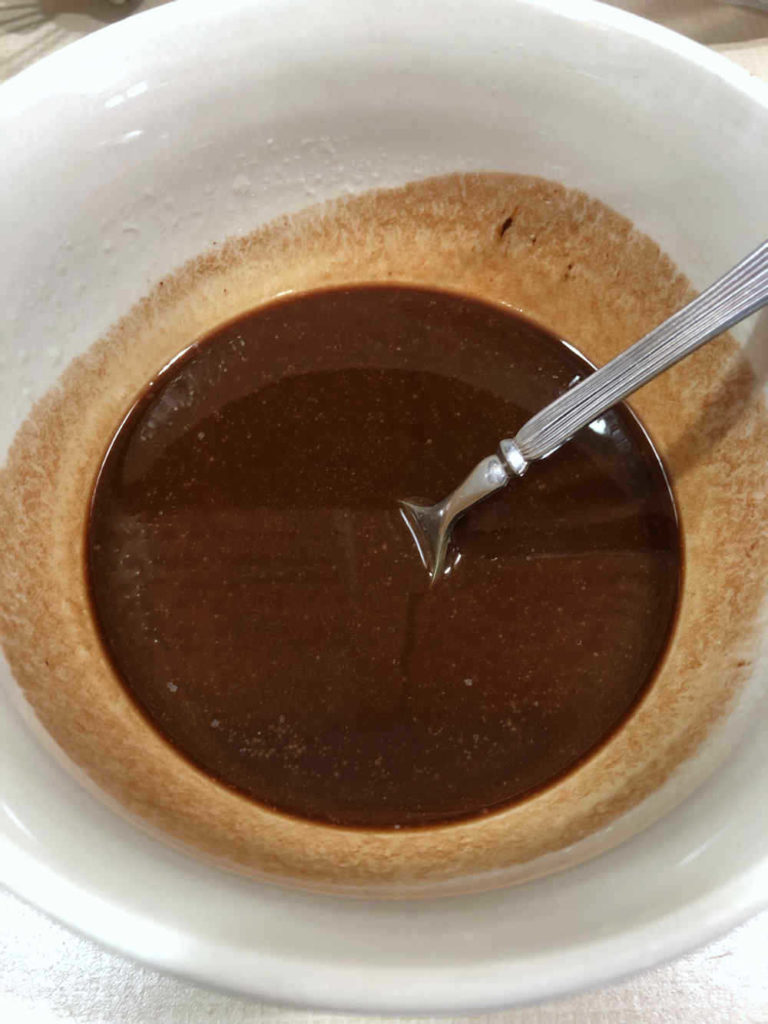
Once the chocolate and butter are melted and smooth, add to the brown sugar and beat until light and well combined.
Add the egg and beat until fluffy.
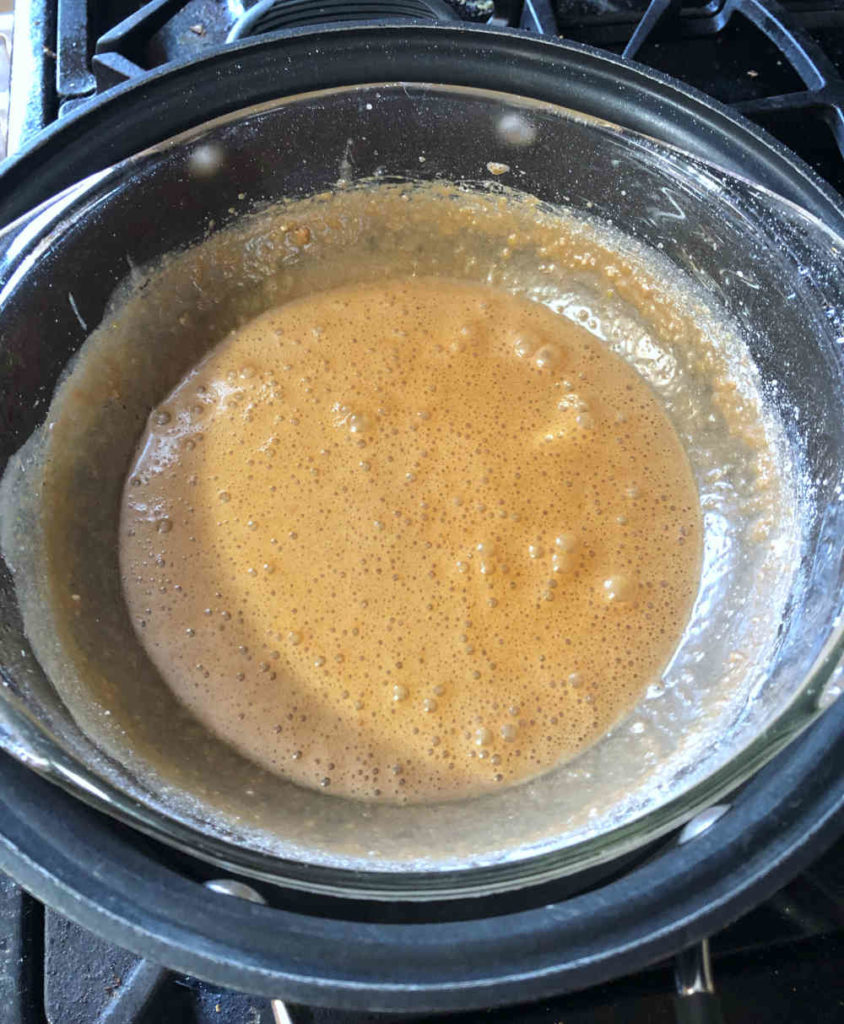
Sift the flour and the soda and powder together into the sugar mixture and add the milk.
Beat until the batter has come together.
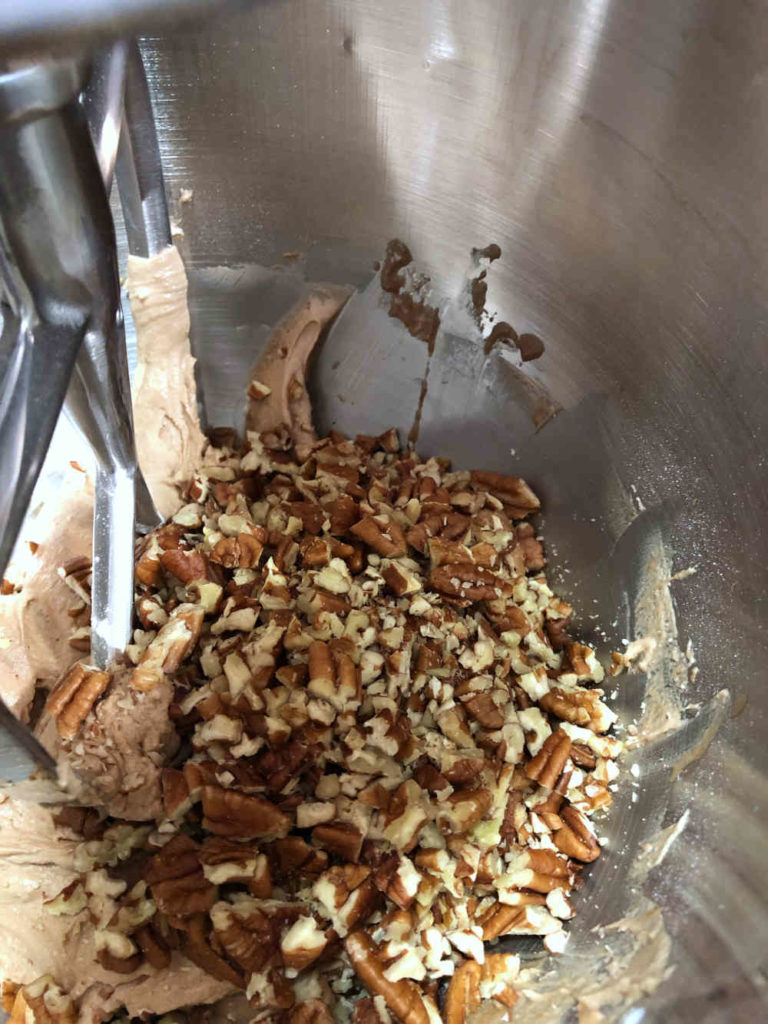
Gently fold in the nuts.
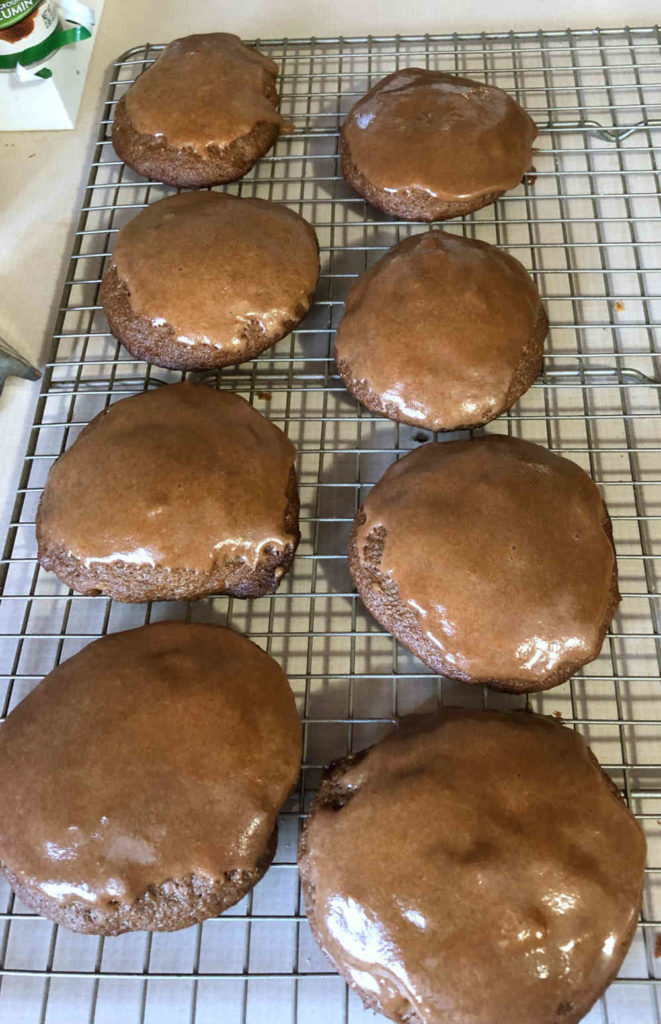
Drop batter onto a parchment or silicon mat lined baking tray.
Bake for 10-15 minutes, depending on the size of the cookie.
Cool completely on a rack.
For the frosting:
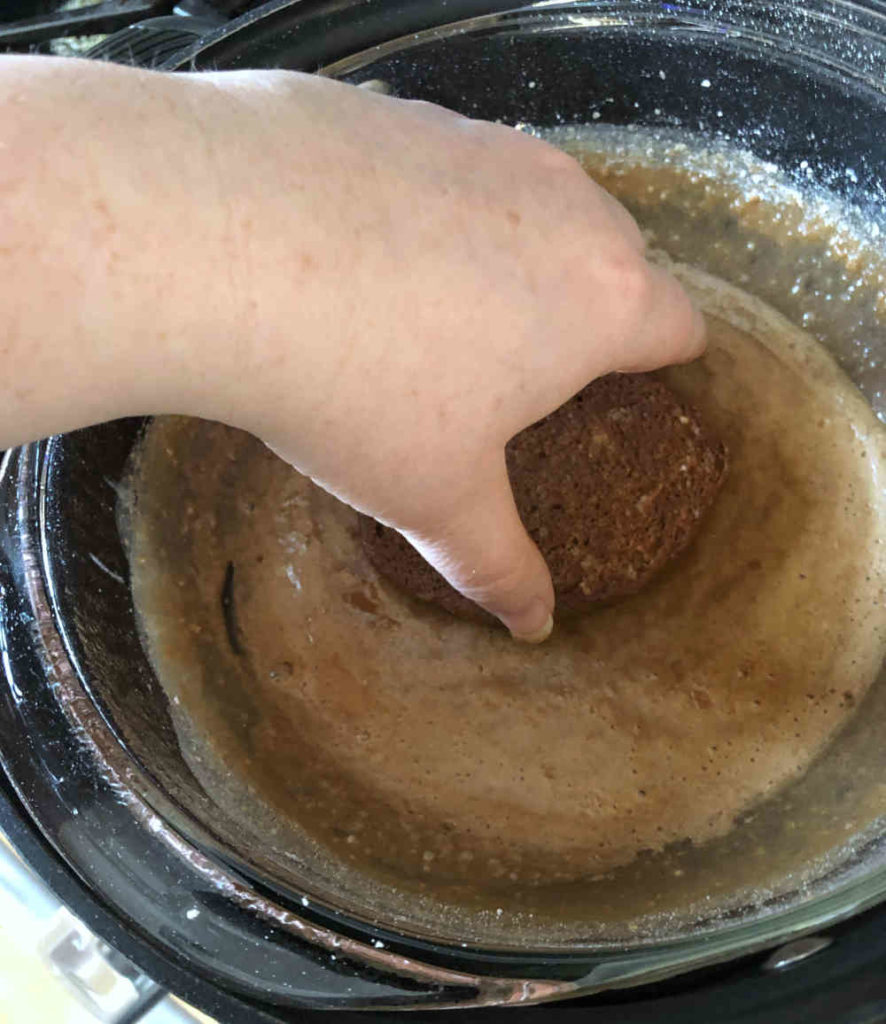
Put all of the ingredients in a heat-proof bowl, and put over a pot of boiling water (a double boiler).
Whisk together over the heat until completely smooth.
If the consistency is too thin, gradually add powdered sugar until it reaches the consistency you're looking for.
Dip the cookies in the frosting, allowing the glaze to drip off a bit. Give a quick twist, and let dry on the cooling rack.
Notes
I am an impatient cookie person, so I tend to make my cookies on the large side. I used a large tablespoon for mine. If you use something smaller, you may want to check for the doneness at 8 minutes instead of 10.


No Comments